
Introduction
Planting seeds and starting your plants from them is a great way of gardening. You need to account for many factors and one of them includes timing. If you need fresh topsoil for creating new garden beds or for your planters, you can search for “topsoil near me” and buy some from the nearest store. Let’s check out when you should plant your seeds and a few other things about starting seeds.
The Details
- Timing – When you’re starting seeds indoors, you need to make sure that the transplants are ready to be planted outdoors on your garden bed when the weather conditions are perfect. Fortunately, the seed packets you buy contain all the necessary instructions on the label. The label should contain information about the right time for starting seeds indoors. It would usually have something like “Plant inside six weeks before the last frost” written on it.
That means you need to figure out when the last first hits in your area. That information can be easily found on various farmer’s almanac websites on the internet. You simply need to enter your postal code to figure out the last frost date. Different seeds have different start times. For instance, while broccoli, melon, and pepper should be started around 2 weeks before the last frost, other plants like lettuce, onion, and cabbage should be started around 4 weeks before the last frost.
That’s not all. Some seeds are well-suited for starting indoors while others should be directly seeded outdoors. Some plants like basil can be seeded both indoors and outdoors. Plants like peas and spinach should be directly seeded outdoors around 6 weeks before the last frost. Outdoor seeders germinate and grow very quickly and that’s why there’s no point in seeding them indoors.
Plants that are well-suited for outdoor seeding would have the term “direct sow” written on the seed packet label. With that out of the way, let’s check out a few other factors you should look out for while starting seeds.
- Containers – Fortunately, there’s no strict rule for the material of containers. You can get an expensive one made out of stone or concrete or buy some cheap ones made out of clay or plastic. Either way, the material of the pot doesn’t heavily influence how the seeds will germinate or grow. You just need to make sure that the containers have a depth of at least 3 inches and have a fair number of drainage holes.
If you don’t want to spend any money on containers, you can even go the DIY route. Home gardeners have made seed starter containers from everything including paper cups and milk cartons. You can also buy specialized seed starting trays. They are highly convenient and easy to fill. They also have a good watering system that maintains consistent moisture levels. They are also designed for easily removing transplanters when they are ready to go to the plant bed.
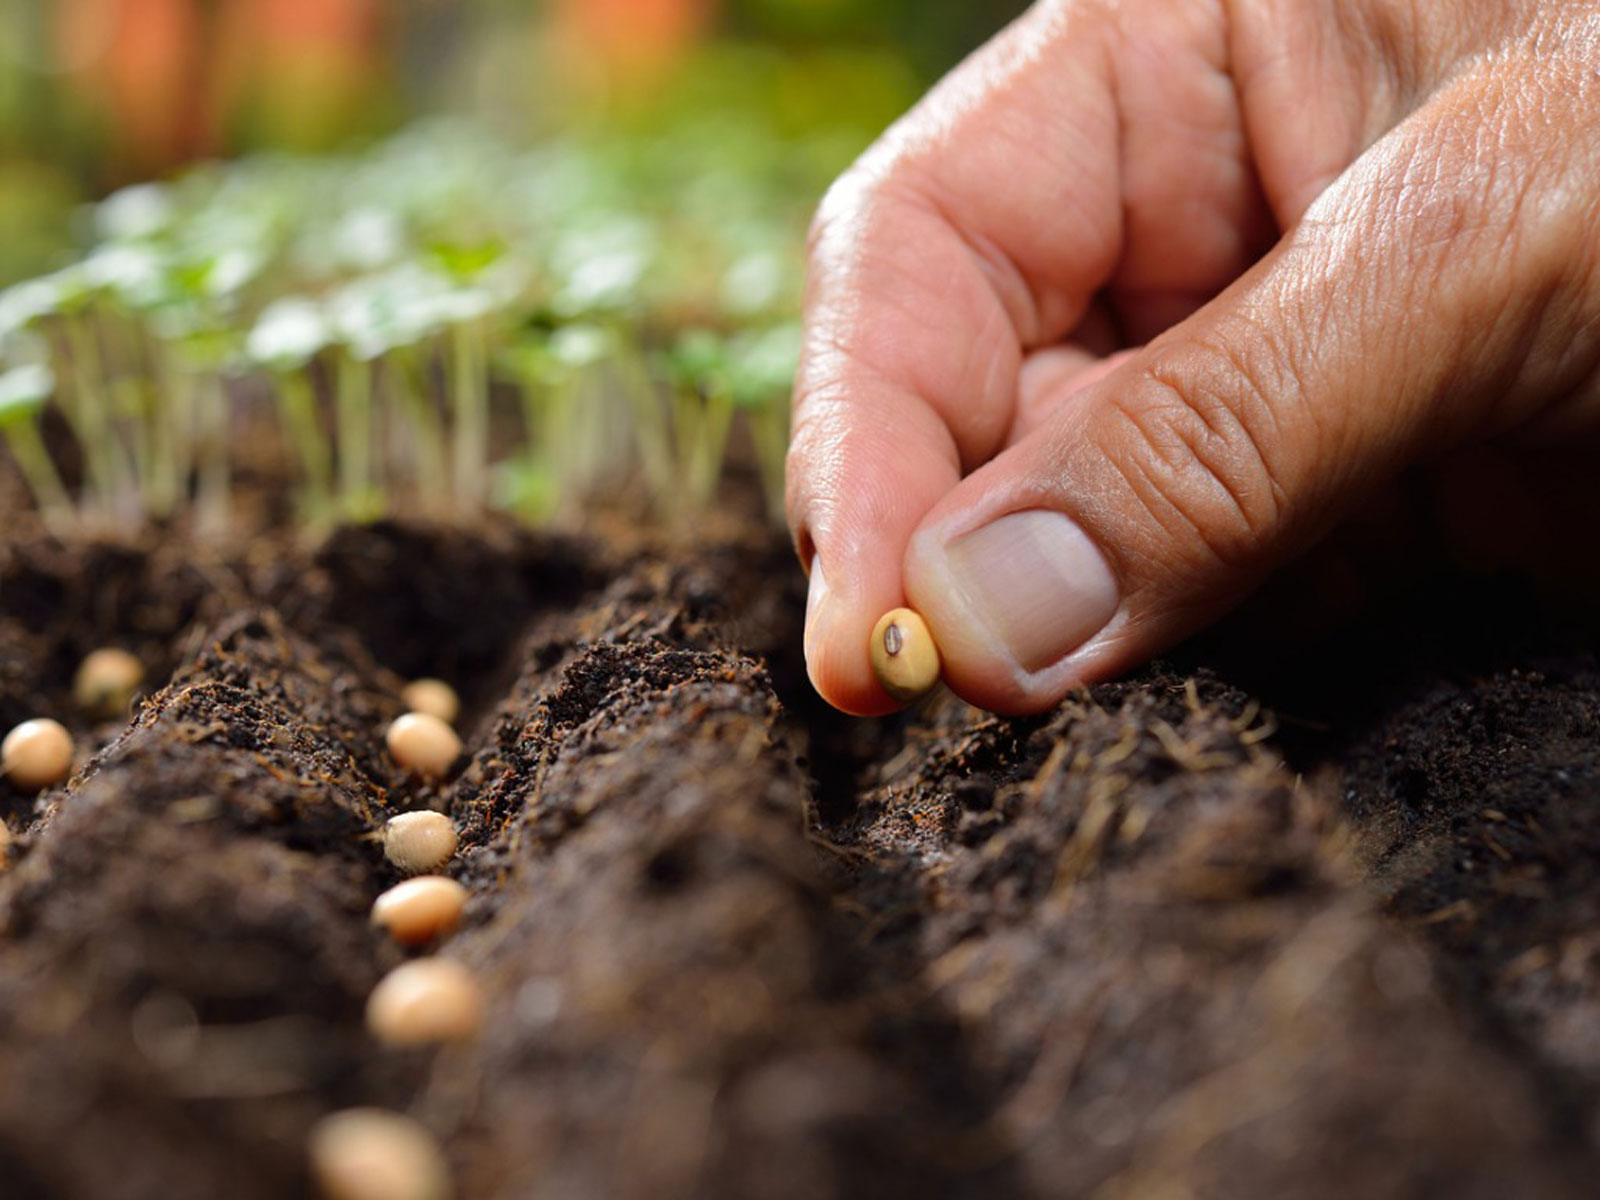
- Potting soil – Potting soil is very important for starting seeds. They can make or break seed germination. You can’t afford to cheap out with potting soil and reuse potting soil from houseplants or dig out some from your garden. You need to buy fresh and sterile potting soil that doesn’t have any weeds or diseased seedlings. This ensures quick sporting, germination, and healthy growth.
Before you fill up your containers with potting soil, use a large tub or bucket to moisten it properly. Be careful while moistening the planting mix. You want it to be moist with the soil structure maintained. You don’t want the potting mix to be crumbly, soppy, or gloppy. After you fill up the containers, pack the soil well to get rid of large gaps.
Since potting soil mixes are made to be sterile, they don’t have any nutrients. So, the potting mix needs compost as a base and after the seeds germinate, they need to be fed with a fast-release liquid fertilizer for a few weeks. You need to consistently feed the transplant with a liquid fertilizer right before transferring it to the garden.
- Plating – The seed packet would contain information about seeding depth. Some small seeds can be sprinkled right on the top of the soil while larger seeds need to be buried a couple of inches deep. Follow the label instructions and moisten the seeds with a small watering can. You can also cover the containers with a plastic dome or wrap to speed up seed germination. This way moisture doesn’t get to escape from the top before the seeds can germinate. When you see a small green shoot or even any signs of green on the pot, you’re ready to remove the plastic wrap.
- Water and feed – As the seed germinates and starts to grow, moisten the soil with a watering can or mister. When the soil dries up, moisten it again and keep repeating. You can also use a fan to prevent diseases and promote airflow. As mentioned above, you also need to feed the seedling consistently with a liquid fertilizer. This cycle of fertilizer feeding, and watering needs to continue before the plant gets transferred outdoors.
- Light – Like regular plants, seedlings require plenty of light. That’s why it’s best to grow them near a south-facing window and rotate the container every day to prevent the seedling from leaning towards the sun. You can also use artificial UV light and adjust them to be just a few inches over the container. Set them on a timer for 15 hours of light exposure every day. You need to keep raising and just the position of the light as the seedling grows.
Conclusion
The spring season is the perfect time for planting and starting new seeds. While you can always grow seeds outside, growing them indoors gives you more control over the environment and other such factors. If you need topsoil for your plant pots or for creating new beds, you can search for “topsoil near me” and buy some from a store nearby.


Comments